Manage Integrations in Medusa Admin
In this guide, you'll learn how to manage integrations in Medusa Admin.
View Integrations List
To view the integrations list:
- Open Medusa Admin.
- Go to Settings → Integrations.
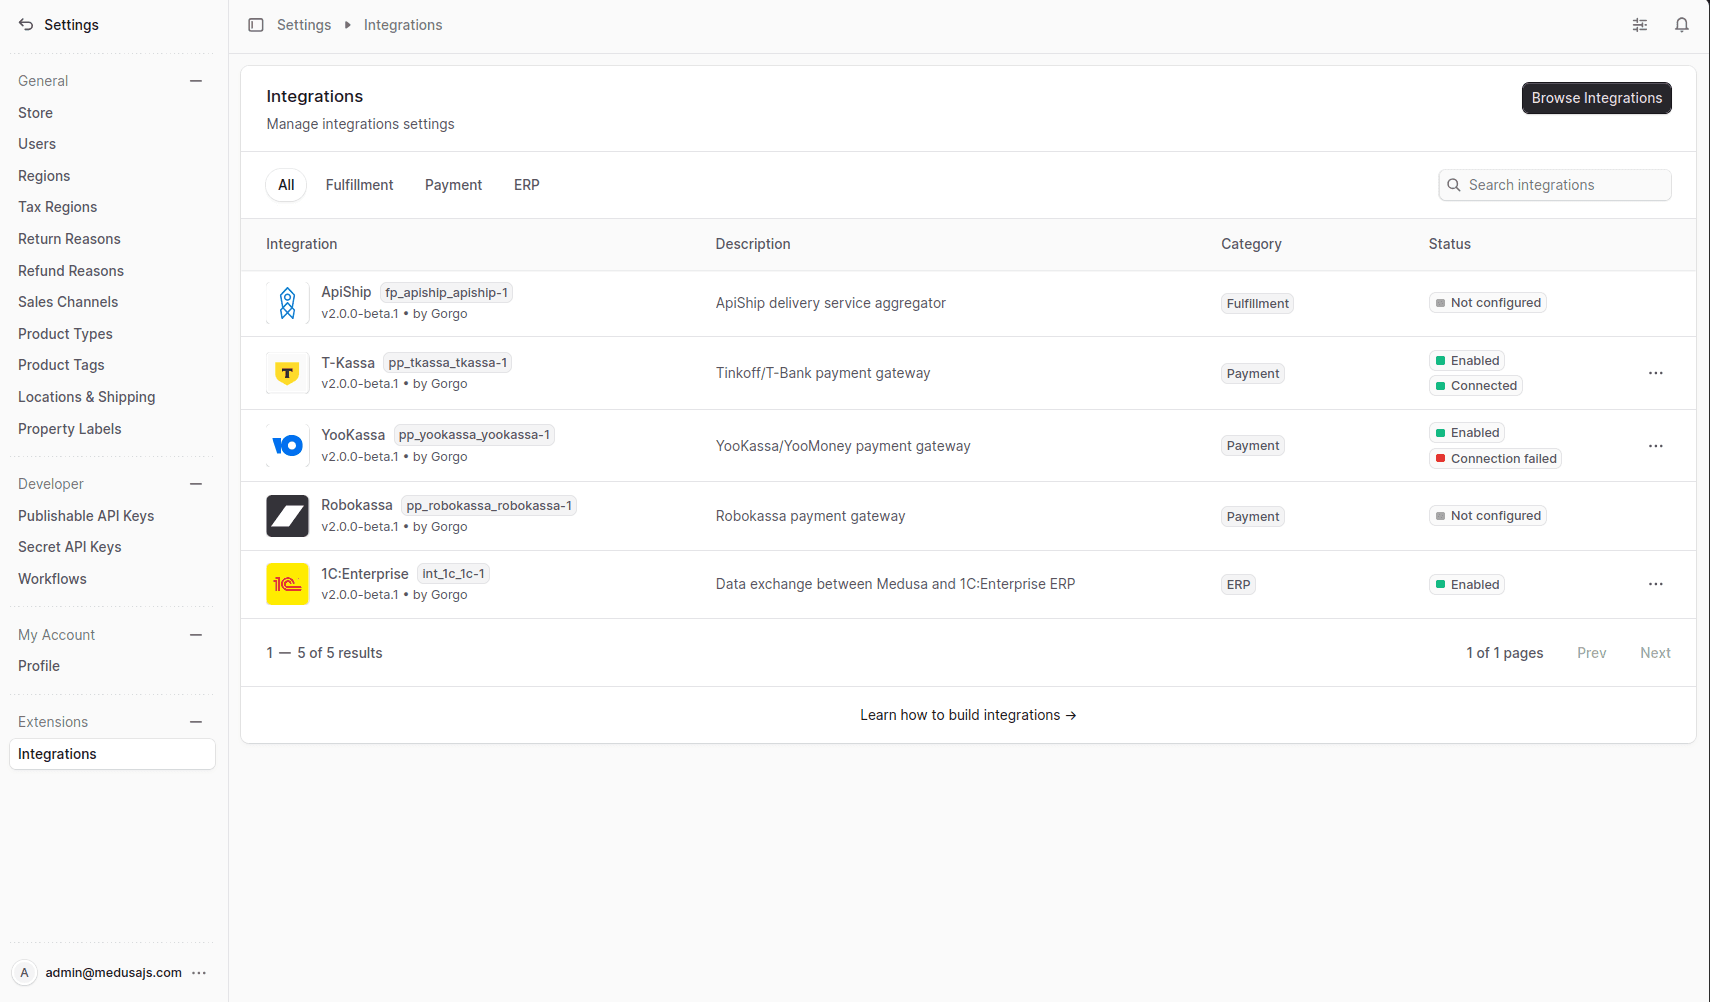
This opens the list of every integration registered in the project: the provider's name and icon, the package author, its description, and category. Each integration shows a status. You can filter the list by category and search by name.
Integration Statuses
The lifecycle status is always shown, and can be one of the following:
| Status | Description |
|---|---|
| Not configured | No section of the settings has been saved yet. |
| Incomplete | Some sections are saved, but not all required fields are filled in, or the values entered don't pass validation. |
| Enabled | The integration is fully configured and enabled: the provider receives its options at runtime. |
| Disabled | The integration is fully configured, but disabled: the provider stops receiving its options, as if it weren't configured. |
If the provider supports connection testing, a separate status is shown alongside the lifecycle status, based on the result of the last test:
| Status | Description |
|---|---|
| Connected | The last connection test succeeded. |
| Connection failed | The last connection test failed. |
While the connection test hasn't been run yet, this status isn't shown.
Browse and Add an Integration
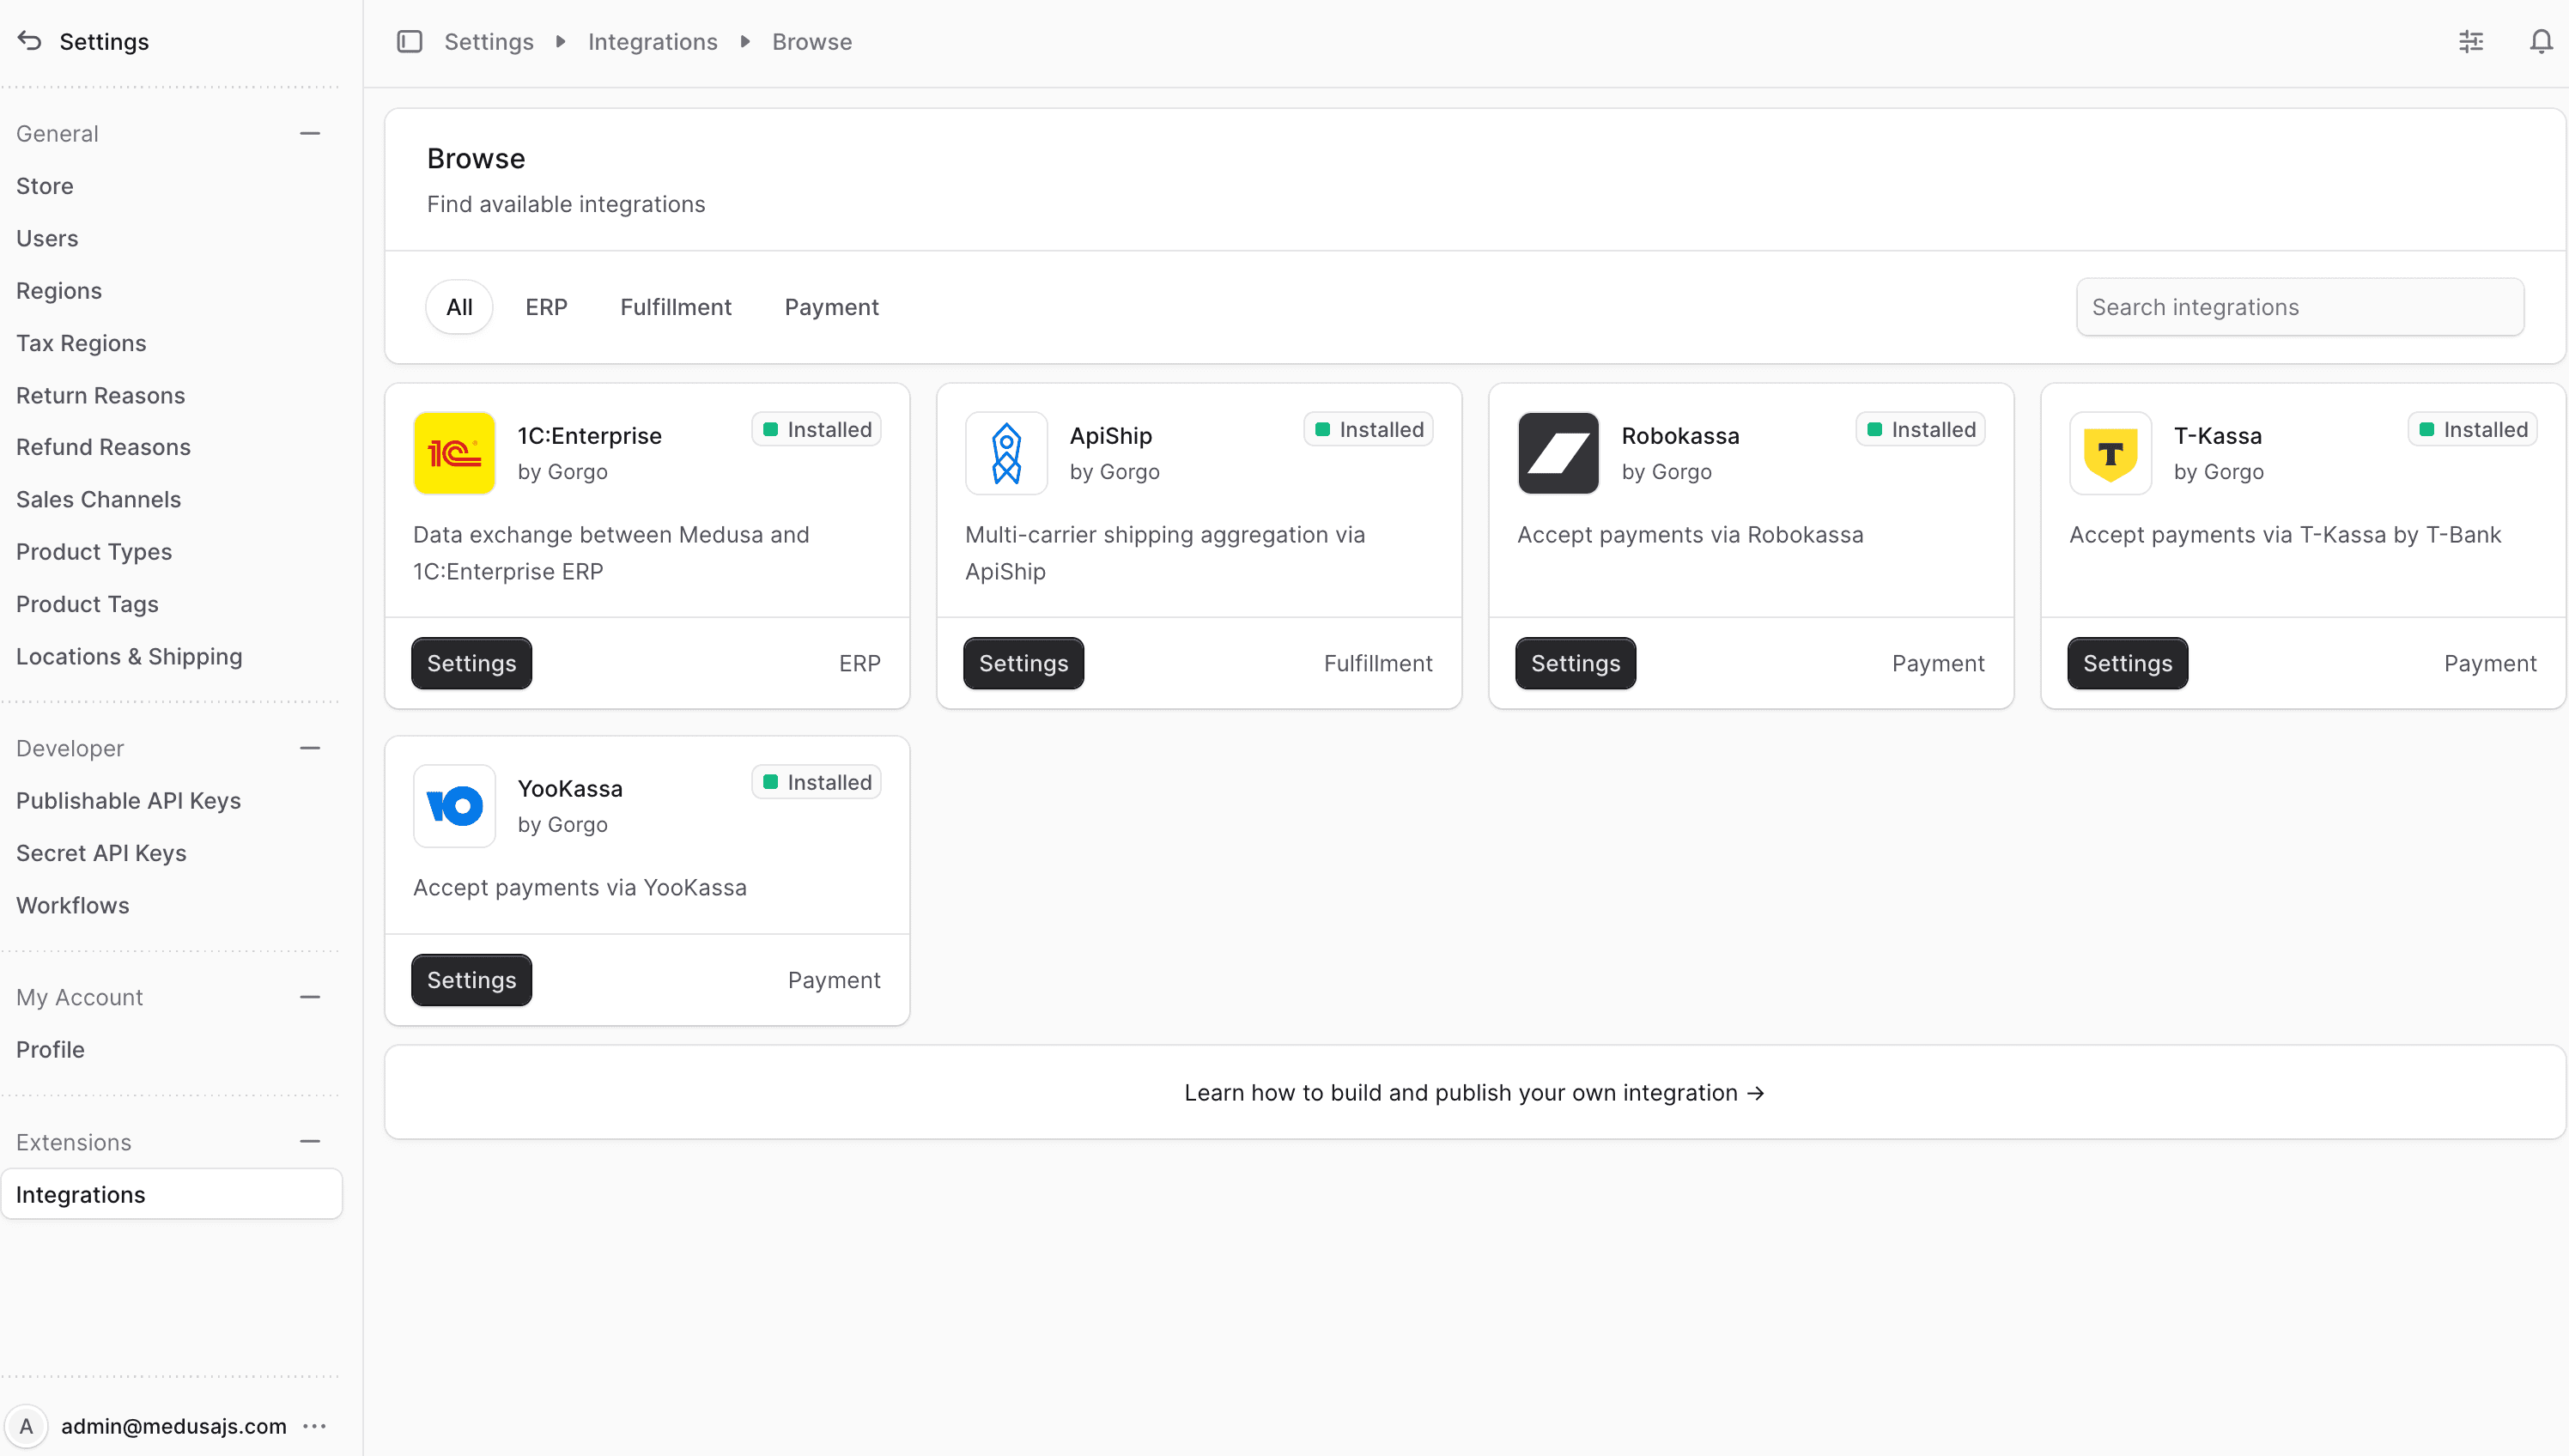
The catalog lists integrations that aren't registered in the project yet, alongside the ones that already are.
To add a new integration:
- Go to Settings → Integrations.
- Click Browse Integrations.
- Find the integration you want to add.
- Click Add.
- Follow the setup guide in the modal that opens: it walks through the install command, the registration snippet, and the configuration steps to complete once the server is back up. Each code block has its own copy button.
- Restart the server.
The integration then appears in the list as Not configured, ready to configure.
Configure an Integration
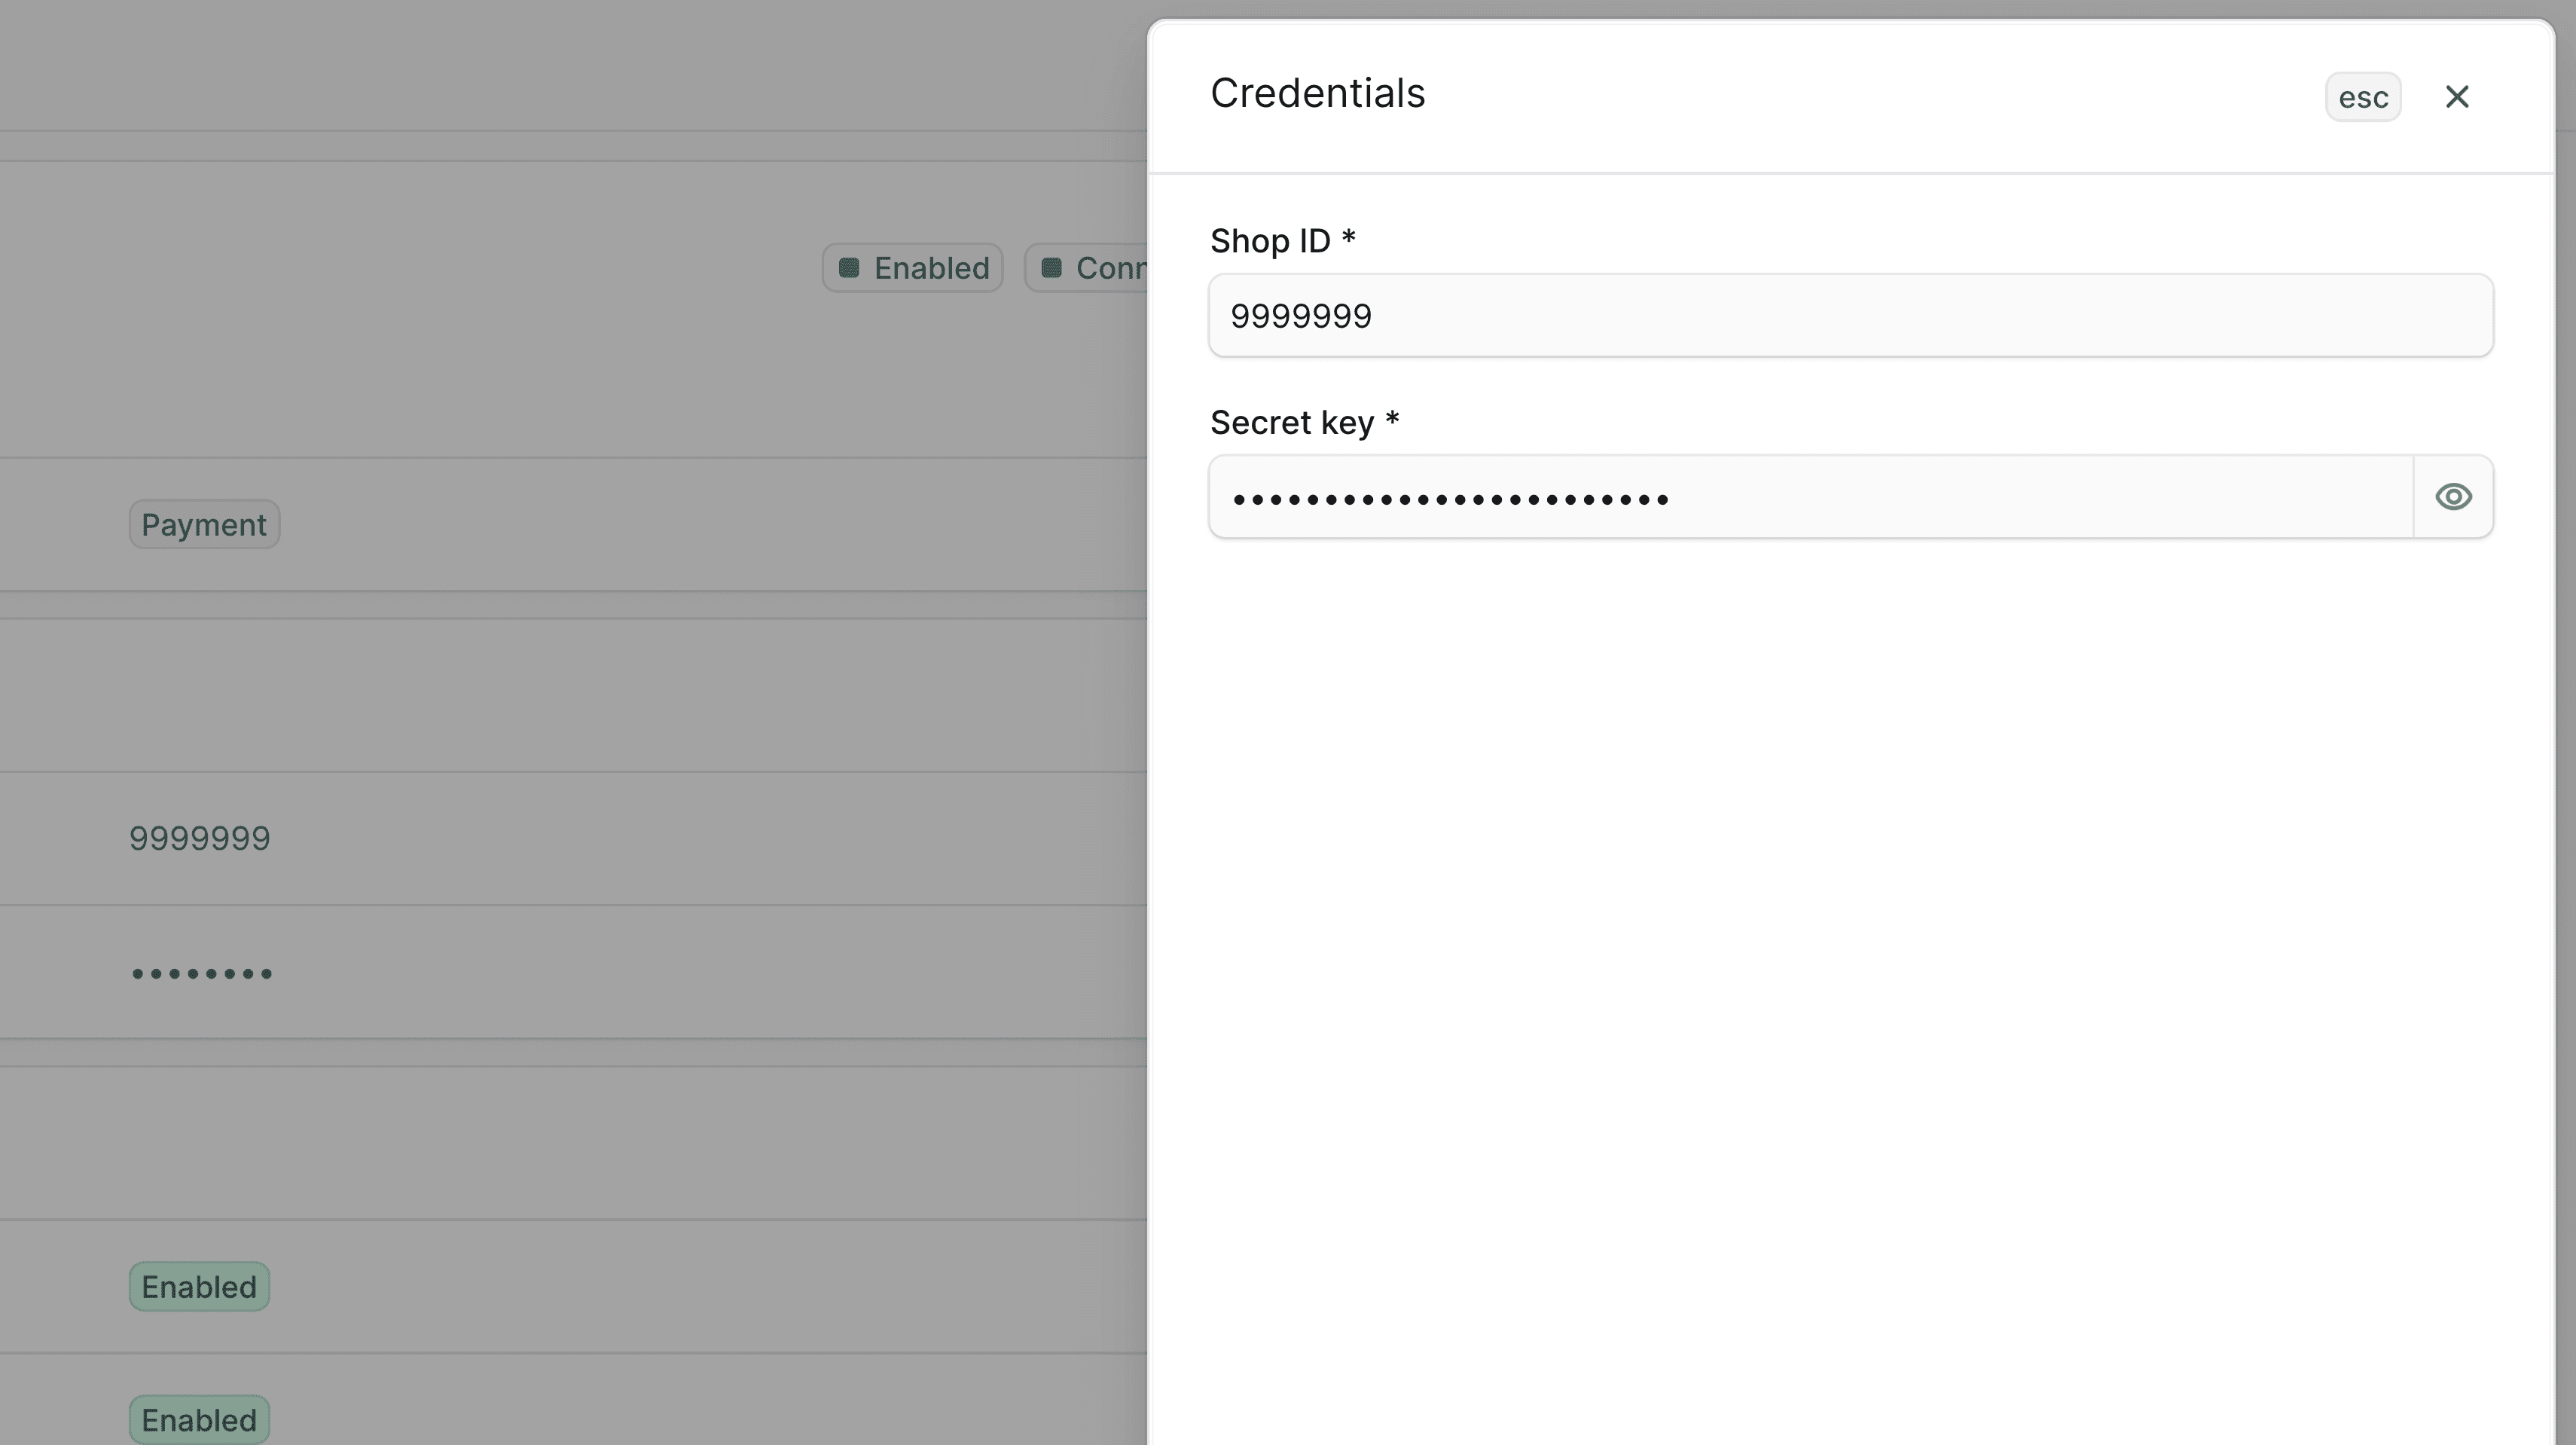
Until an integration is configured, its page shows sections with empty required fields. There's no separate action for the initial setup: saving any section with its fields filled in creates the configuration.
To configure an integration:
- Go to Settings → Integrations.
- Open the integration you want to configure.
- Click the action menu in the header of the section you want to fill in.
- Choose Edit.
- Fill in the required fields in the side panel that opens.
- Click Save.
Test Connection
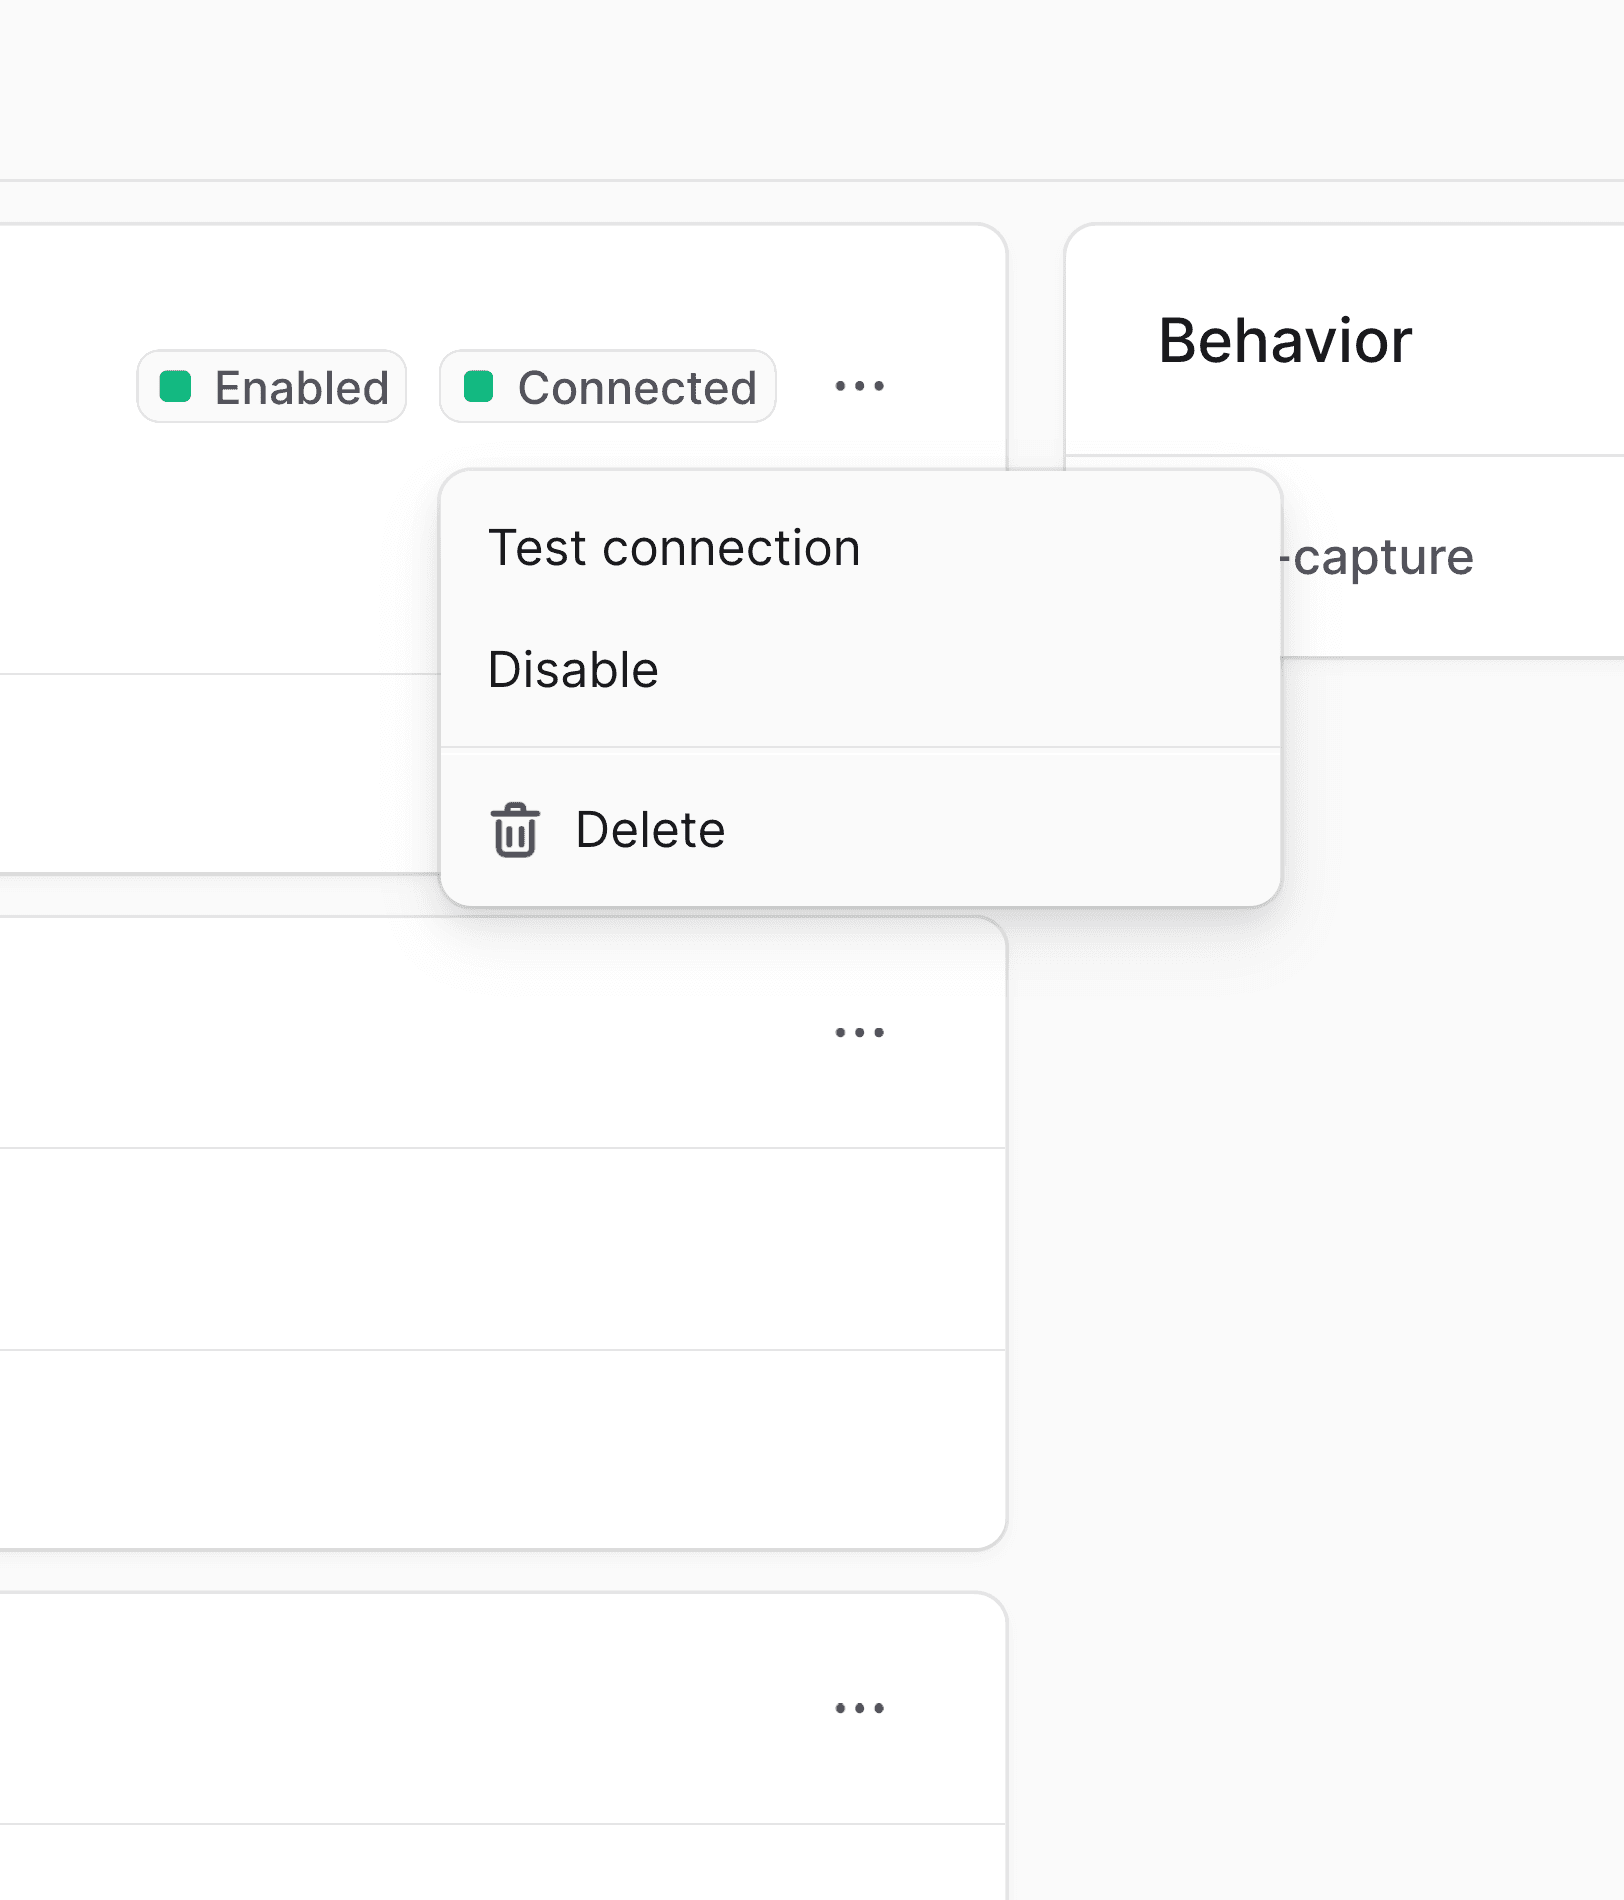
Some providers support connection testing, which confirms the values you entered are actually accepted by the provider before the integration is used for real. If a provider doesn't support this, the action won't appear in the menu.
To test the connection:
- Go to Settings → Integrations.
- Open the integration you want to test.
- Open the action menu next to the integration's name.
- Choose Test connection.
The result appears in a notification.
Edit a Section
Sections of an already configured integration are edited the same way as during initial setup.
To edit a section:
- Go to Settings → Integrations.
- Open the integration you want to edit.
- Click the action menu in the header of the section you want to change.
- Choose Edit.
- Update the field values in the side panel that opens.
- Click Save.
Enable and Disable an Integration
A disabled integration keeps its stored settings, but the provider stops receiving them, as if the integration weren't configured.
To enable or disable an integration:
- Go to Settings → Integrations.
- Open the integration you want to update.
- Open the action menu next to the integration's name.
- Choose Enable or Disable.
Delete an Integration
Deleting an integration only erases its stored data: the token and the rest of its section values. The provider itself isn't removed as a source of the integration. It stays registered in and reappears in the list as not configured. To remove the provider entirely, delete its entry from in .
To delete an integration:
- Go to Settings → Integrations.
- Open the integration you want to delete.
- Open the action menu next to the integration's name.
- Choose Delete.
- Confirm the deletion.